

We’ve all been there before. It’s Monday morning, and you’ve just opened your inbox and found hundreds of unread emails that need your attention. Now you’re spending hours of your day trying to go through each one and organize them as new messages keep popping up.
You’ve probably thought there has to be a better way to handle this process. The good news is, you’re right! For Microsoft 365 users, Outlook has a built-in tool called “Quick Steps” designed to help users automate a wide range of repetitive email tasks. This lets you spend less time fighting for control of your inbox and more time driving the business forward.
Outlook Quick Steps are essentially customizable shortcuts you can create to help you automate different Outlook tasks. You can combine multiple manual actions together and program them to trigger with just a click of a button.
Using Quick Steps can help you save a considerable amount of time throughout the week, performing repetitive tasks that take you away from other important initiatives. This not only helps you to stay more productive, but also makes sure you have a consistent framework for reading, organizing, and prioritizing emails and responses.
Common Quick Steps Use Cases
Getting started with Outlook Quick Steps is relatively straightforward and easy to manage. Below is a step-by-step guide you can follow to create your own custom automations.
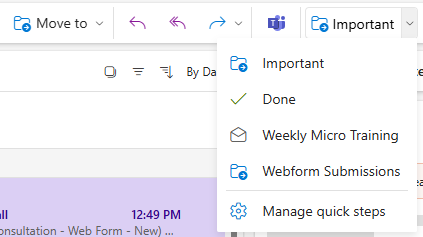
Open your Outlook email client and navigate to the Home tab. If your Outlook ribbon doesn’t already display the Quick Steps option, you can find it by clicking on the “Important” Folder Icon in the dropdown list.
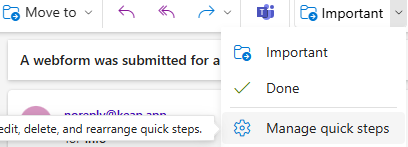
Once you find it, click the Manage Quick Steps option.
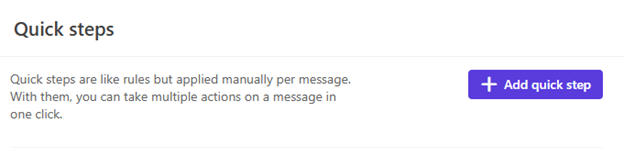
Click the Add Quick Step Button. You can also choose from a list of predefined Quick Step options or edit an existing one.
Now, apply a detailed name to your task that’s easy to remember. You can choose a custom icon to associate with your Quick Step.
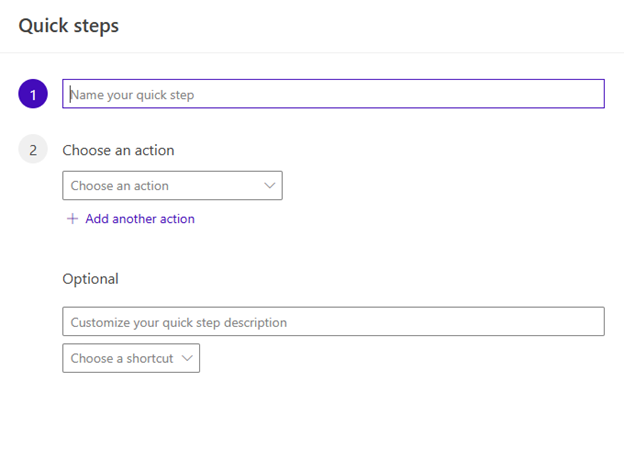
Click the Choose an Action dropdown to select from a large number of automations to apply to your Quick Step.
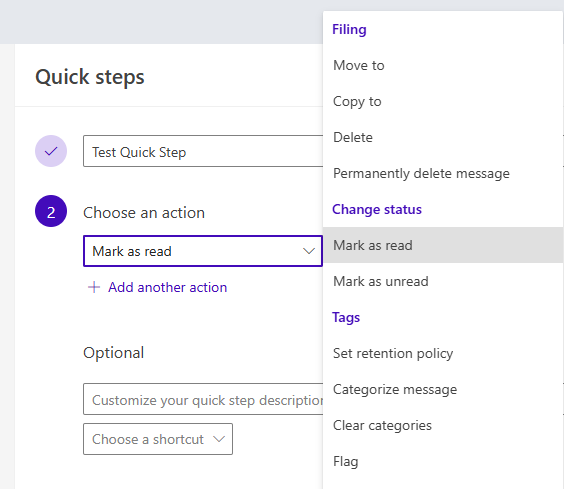
You can add multiple automations to each of your custom Quick Steps by clicking the Add Another Action button.
You’ll have the option of creating a keybinding shortcut to your tasks by clicking the Choose a Shortcut dropdown.
Click the Save button when you’re done customizing your Quick Step.
Once your Quick Step has been created, you’ll have a couple of different ways you can access it and apply it to your emails.
In the Home tab, look for the “Important” folder Icon dropdown menu — it’s usually located in the middle of the ribbon. Your custom Quick Step should appear as a button there (with the name you gave it). Click the Quick Step to run it.
Alternatively, if you assigned your Quick Step a Shortcut Key, you can type in that Shortcut Key.
Note: For Quick Steps to work, you need to select (click on) the email or emails you want the actions to apply to.
Microsoft Outlook is a core component of your 365 subscription. It’s important that you look for ways to get more value out of your investments, and Quick Steps are a great way to achieve this.
By taking the time to create different Quick Steps, your business can benefit from:
While Microsoft Outlook is a powerful tool for your business, it’s only one of the many investments required to move your business forward. But most of the time, knowing how to leverage these investments to the full extent requires the right level of experience.
LDD Consulting is a trusted IT specialist with over 20 years of experience helping businesses implement the right technology solutions to help them grow sustainably. If you want to learn how to get more value from the investments you’ve already made, or need assistance choosing the right tools for your business, contact LDD today for a free consultation.